

Last Updated: October 24, 2026
Quick Summary
Wildlife photography techniques for Tanzania game drives require specific camera settings, lens choices, and positioning strategies that work in real field conditions. Use a minimum shutter speed of 1/1000th of a second, ISO 1600 or higher, aperture between f/5.6 and f/8, and continuous autofocus to capture sharp images of moving animals from a safari vehicle.
- Use shutter speed of at least 1/1000th of a second, pushing toward 1/2000th for running animals
- A 70-200mm telephoto lens is the minimum viable setup, with 100-400mm or 150-600mm recommended for flexibility
- Early morning from sunrise to 9 a.m. and late afternoon from 4 p.m. onward offer the best light quality
- Always focus on the animal's eye and shoot in bursts to capture multiple moments and positions
- Shoot in RAW format to recover blown highlights and lift shadows in harsh field lighting conditions
Table of Contents
- Master Wildlife Photography Techniques on Your Game Drive
- Wildlife Photography Camera Settings That Work in the Field
- Choosing the Best Lens for Safari Photography
- Photographing Wildlife from a Safari Vehicle
- Best Time of Day for Safari Photography
- Composition and Focus Techniques for Moving Animals
- Protecting Your Gear and Maximizing Your Shots
- Start Your Safari Photography Journey with Simcha
- Frequently Asked Questions
Master Wildlife Photography Techniques on Your Game Drive
Getting sharp, compelling shots of wildlife requires more than pointing a camera at animals. Wildlife photography techniques for Tanzania game drives demand specific camera settings, lens choices, and positioning strategies that work in real field conditions, not controlled environments.
The challenge is executing those techniques while sitting in a moving vehicle, tracking a subject that won't wait for perfect light, and managing gear in dust and heat. This guide walks you through the exact wildlife photography techniques that deliver results on actual game drives.
We'll cover camera settings for variable light, lens selection for different distances, composition for moving targets, and the reality of shooting from a vehicle, so you can adapt when conditions shift.
Wildlife Photography Camera Settings That Work in the Field
Your camera settings determine whether you capture the moment or watch it disappear. Start with shutter speed: for moving wildlife, use at least 1/1000th of a second, and push toward 1/2000th for a running animal. That demands more light or higher ISO, but sharp beats dim every time.
ISO is your flexibility tool. Don't fear it. Modern cameras handle ISO 1600 or higher without excessive noise. Early morning and late afternoon light forces high ISO choices, accept that trade-off. A slightly grainy sharp image beats a perfectly clean blurry one.
Aperture sits between f/5.6 and f/8 for most wildlife work, giving enough depth of field to keep the animal's eyes sharp while blurring the background. Wider apertures (f/2.8 to f/4) work for close subjects but demand perfect focus on the eyes; narrower apertures (f/11 and beyond) reduce light and slow autofocus response.
Use aperture priority or manual mode, letting your camera adjust shutter speed based on available light while keeping your ISO ceiling set to prevent dangerously slow shutter speeds.
Enable continuous autofocus (AF-C or AI Servo), which follows movement rather than locking on one point. For Tanzania-specific wildlife photography tips that expand on these technical settings, explore how they apply in the field.
| Setting | Value | Why It Matters |
|---|---|---|
| Shutter Speed | 1/1000 minimum | Freezes motion, prevents blur |
| ISO | 1600+ acceptable | Maintains fast shutter in low light |
| Aperture | f/5.6-f/8 | Sharp eyes, blurred background |
| Autofocus | Continuous (AF-C) | Tracks moving subjects |
| Focus Mode | Zone or tracking | Adapts to unpredictable movement |
Shoot in RAW, not JPEG. RAW captures more data, letting you recover blown highlights or lift shadows when field conditions throw harsh light and deep shadows at you simultaneously.
Choosing the Best Lens for Safari Photography
Lens choice defines what you can capture. The best lens for safari photography depends on your position and how close animals approach.
A 70-200mm telephoto lens is the minimum viable setup. It compresses distant scenes and brings subjects larger into your frame. For serious work, a 100-400mm or 150-600mm lens gives you flexibility across the full range of situations you'll encounter.
Telephoto lenses introduce trade-offs: they're heavier, slower in low light, and demand faster shutter speeds to avoid motion blur from magnification.
Image stabilization (IS, VR, or OSS depending on your brand) reduces blur from camera shake and vehicle vibration.
Consider a dedicated macro or close-focus lens (90-105mm) for details: bird feathers, insect patterns, flower blooms. Game drives offer opportunities beyond large mammals. A macro lens at 1:1 magnification reveals texture and pattern invisible to the naked eye.
National Geographic wildlife photography guidelines recommend longer focal lengths specifically for safety and subject comfort on African safaris. Longer lenses let you maintain distance while filling your frame with detail.
For How To Plan A Wildlife Photography Trip To Ngorongoro Crater, lens selection becomes even more critical given the crater's unique terrain and wildlife density.
Photographing Wildlife from a Safari Vehicle
Shooting from a moving vehicle creates specific challenges. Vibration transfers through your camera body and lens, and even when the vehicle stops, the engine idles and passengers shift weight.
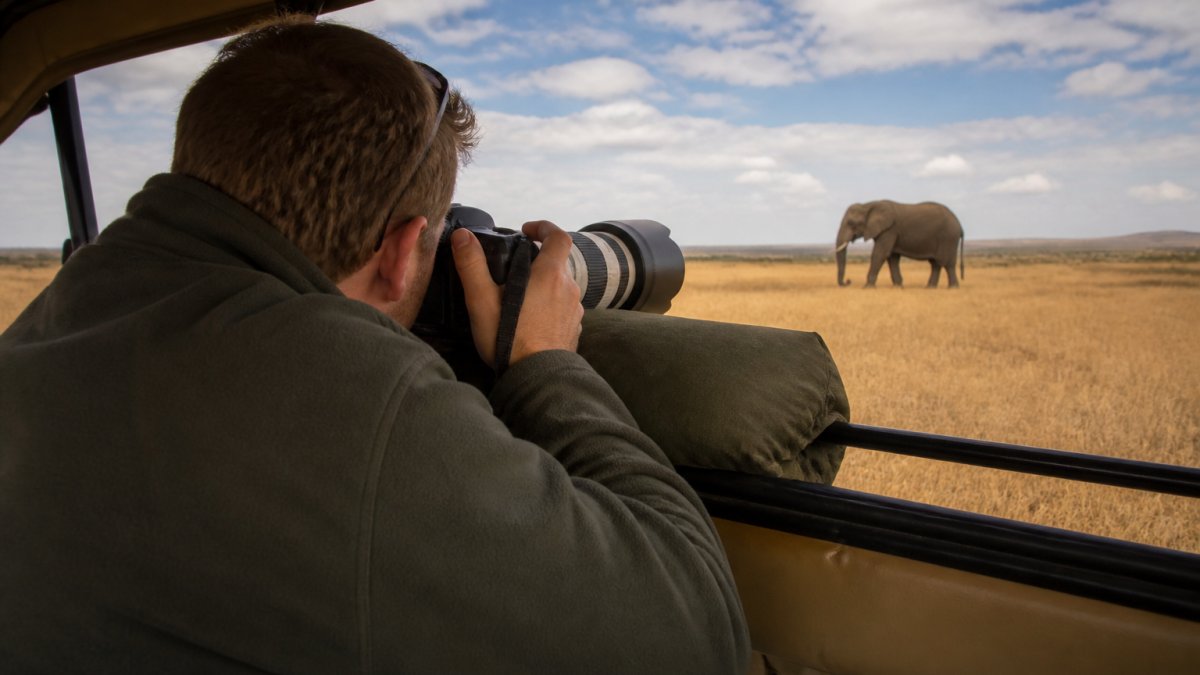
Position yourself for stability. In the front seat, brace your arms against the vehicle frame or dashboard; in the back, use the window frame or roof support.
Open windows completely, not partially. Partially open windows create reflections and refraction that degrade image quality. You want a clear optical path from lens to subject.
Anticipate movement. Watch body language, ears forward, muscles tensed, gaze directed, to signal imminent action.
Respect animal behavior. Don't bang on the vehicle or make sudden movements to get a reaction. Stressed animals produce unnatural behavior, and stressed guides stop cooperating with photographers.
Your guide controls the vehicle's approach. Communicate your needs clearly. Tell your guide you want to stay at distance for telephoto work, or move closer for wider shots.
For location-specific guidance on vehicle selection and positioning, explore How To Choose The Right Safari Vehicle For Tanzania, which addresses the mechanics of platforms designed for photography.
Best Time of Day for Safari Photography
Light quality determines image quality.
Late afternoon, from 4 p.m. onward, offers similar light quality. The sun angles low again, and animals emerge from midday rest to feed and move. Late afternoon light often has more contrast than early morning, with deeper shadows and brighter highlights.
Elephant Love. oil painting. hand painting. African art →
Midday (10 a.m. to 3 p.m.) presents harsh overhead light that flattens subjects and creates deep shadows under eyes and bodies, and animals rest in shade. If you must shoot midday, seek shaded subjects or use fill flash to lift shadows.
Overcast days diffuse light and eliminate harsh shadows. Colors appear muted, but detail is sharp across the frame, and the even light favors action shots because it doesn't punish exposure mistakes. Overcast also reduces glare from water and wet fur.
Rain creates dramatic light and brings animals to water sources. Wet fur and feathers reveal texture and color. Rain also clears dust from the air, sharpening distant subjects. The downside: wet gear and muddy conditions.
For deeper exploration of timing strategies specific to major wildlife events, see How To Photograph Great Migration Tanzania, which covers seasonal patterns and peak activity windows.
Composition and Focus Techniques for Moving Animals
Composition rules apply to wildlife, but animals don't follow them, so you adapt your framing to the animal's position and behavior.
Rule of thirds works for stationary subjects. Moving animals demand faster decisions. Frame to lead the animal, if it's running left, place it on the right side of the frame with space to move into.
Focus on the eye, always. A sharp eye with a soft body is acceptable; a soft eye with a sharp body is failure. Modern autofocus systems track eyes reliably in continuous mode, so use eye-detection autofocus if available to lock onto animal eyes as the subject moves.
Shoot in bursts, not single frames. Animals move unpredictably. A burst of 5-10 frames captures multiple moments. One frame might have the eye soft. The next has perfect focus and a dynamic pose. Burst mode gives you options.
Compose for context. Include the environment, habitat, other animals, and landscape to tell a complete story.
Watch the background. Distracting elements, bright rocks, other tourists, vehicles, pull attention from your subject. Reposition if possible. If you can't move, use a wider aperture (f/4 to f/5.6) to blur the background and isolate your subject.
Protecting Your Gear and Maximizing Your Shots
Dust is your enemy. Tanzania's dry season means fine dust that penetrates camera seals and scratches lenses, and dust storms can arrive suddenly.
Sand and dust also damage autofocus mechanisms and aperture blades. Clean your sensor regularly, but let professionals do it if you're uncomfortable. Compressed air can drive dust deeper into the camera, avoid it.
Battery life drops in heat, so bring extra batteries and keep them cool.
Memory cards fail. Bring multiple cards and rotate between them. If one card fails, you've lost some shots, not everything. Back up images daily if possible. Upload to cloud storage or external drives.
Protect your lens glass. Fingerprints and dust degrade image quality. Bring lens cleaning supplies: a rocket blower, microfiber cloth, and lens cleaning solution designed for optics (not eyeglass cleaner).
Consider a waterproof camera bag for river crossings or water-based game drives. Some safaris include boat components. Waterproof doesn't mean waterproof, it means water-resistant.
Chimping (reviewing images on the camera's screen) drains battery and distracts you from the present moment. Review sparingly during the game drive and save detailed review for evenings.
Start Your Safari Photography Journey with Simcha
Wildlife photography on a game drive demands preparation, but it rewards attention with images that capture the raw power and beauty of African wildlife. The techniques we've covered, camera settings, lens selection, positioning, timing, and composition, work together to transform you from someone pointing a camera at animals into a photographer capturing authentic wildlife moments.
Simcha African Safaris Limited specializes in curated safari experiences that blend wildlife exploration with authentic cultural discovery. Our guides understand photography and position game drives to maximize your shooting opportunities. We offer flexible safari durations from 3 to 7 days, so you can choose the timeframe that fits your schedule.
After your safari, bring home more than photographs. Our handcrafted African art collection includes pieces like the African Heritage Sculpture, an elephant sculpture carved from Mpingo wood that embodies African tradition and heritage, a tangible reminder of the wildlife and landscapes you've experienced.

Request a quote from Simcha African Safaris Limited and begin planning your wildlife photography adventure. Our team will work with you to design a safari that matches your photographic goals and skill level.
Frequently Asked Questions
What camera settings are best for wildlife photography techniques on a game drive?
Start with a fast shutter speed of at least 1/1000th of a second to freeze animal movement. Use an aperture between f/5.6 and f/8 to maintain sharp focus across the animal's body. Set your ISO to auto with a maximum limit (typically 1600-3200) so the camera adjusts as light changes during your game drive. Use continuous autofocus (AF-C or AI Servo) to track moving subjects. Shoot in aperture priority or shutter priority mode to maintain control while the camera handles other variables.
What is the best lens for safari photography?
A telephoto lens between 200mm and 600mm is ideal for safari photography. A 70-200mm lens works for closer subjects, while a 100-400mm or 150-600mm lens gives you flexibility across different distances. Prime lenses (like a 400mm or 500mm) offer superior sharpness and faster apertures but less flexibility. Start with a 100-400mm zoom if you're new to safari photography, it balances reach, image quality, and ease of use from a moving vehicle.
How do I photograph animals from a safari vehicle without camera shake?
Use a vehicle window mount or bean bag to stabilize your lens against the open window frame. Enable image stabilization on your lens if available. Maintain a fast shutter speed (1/1000th or faster) to counteract any vibration. Brace yourself firmly against the vehicle seat and keep your elbows tucked. Avoid shooting with the engine running; ask your guide to cut the engine when you're photographing. A monopod can also help, though it's less practical in a moving vehicle than a bean bag support.
Why is the best time of day for safari photography early morning and late afternoon?
Early morning (sunrise to two hours after) and late afternoon (two hours before sunset) offer soft, warm golden light that flatters wildlife and reduces harsh shadows. These times also coincide with peak animal activity, predators hunt and herbivores feed when temperatures are cooler. Midday sun creates harsh shadows, washes out colors, and drives animals into shade, making photography difficult. The low angle of the sun during golden hour also creates dimension and depth in your images, separating subjects from background.
The difference between a forgettable vacation and a transformative journey often comes down to preparation. Master these wildlife photography techniques, pack thoughtfully, and partner with guides who understand that great photography requires patience, positioning, and respect for the animals you're documenting. Your images will reflect that care.


